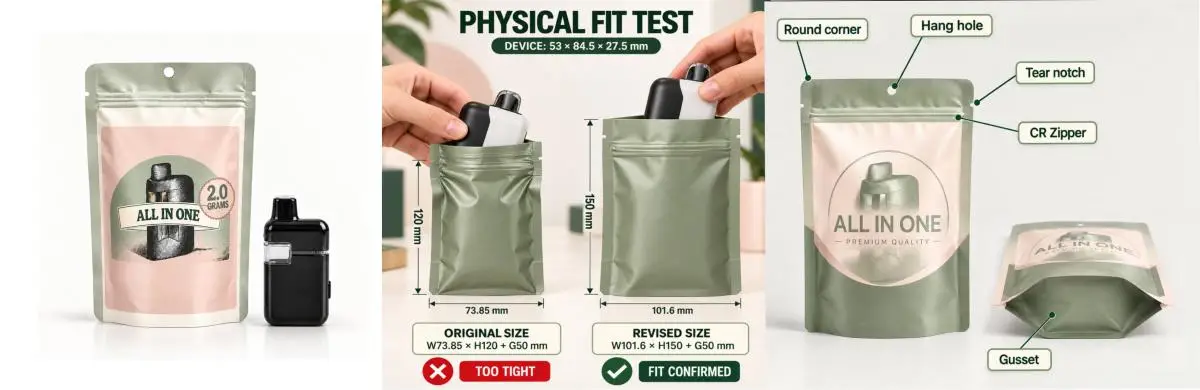
A practical FAQ before mass production An all-in-one pouch should be designed around the real device, not only its width and height. Device thickness, the mouthpiece, buttons and rounded shoulders all affect fit. The pouch also loses usable space to its side seals, zipper, top seal and gusset folds. This FAQ explains what to confirm before we prepare the dieline, make a fit sample and begin mass production.
A practical FAQ before mass production
An all-in-one pouch should be designed around the real device, not only its width and height. Device thickness, the mouthpiece, buttons and rounded shoulders all affect fit. The pouch also loses usable space to its side seals, zipper, top seal and gusset folds.
This FAQ explains what to confirm before we prepare the dieline, make a fit sample and begin mass production.
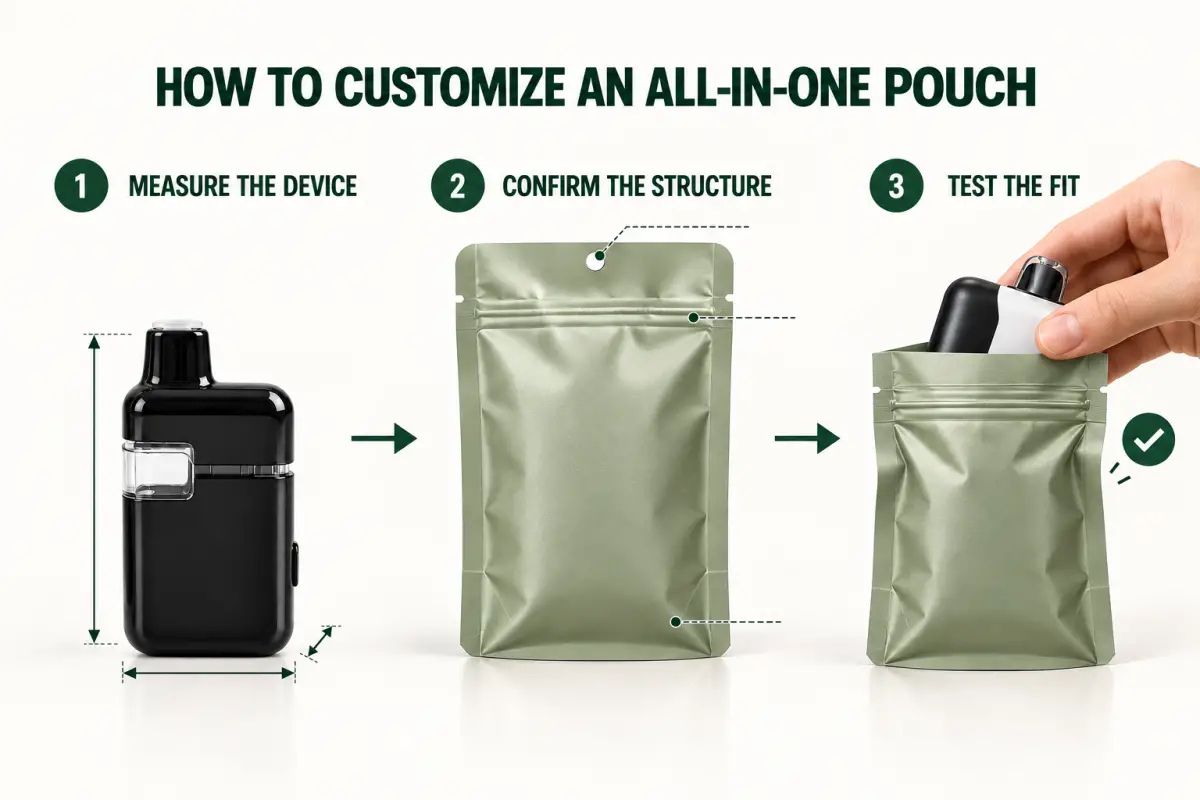
1 What device information should I provide
Provide the final device dimensions as Width x Height x Depth. Depth is especially important. Two devices with the same width and height may need different pouch sizes if their thickness or shape is different.
Whenever possible, also provide:
l Clear front, side and top-view photos
l The device weight
l A technical drawing or 3D file
l Details of buttons, mouthpieces or other protruding parts
l A physical device sample for packing and fit testing
If one pouch will be used for several device models, provide the dimensions of the largest model.
2 Can pouch size be calculated directly from device size
Not accurately. The dimensions shown on a pouch quotation normally describe the finished external size. The usable space inside is smaller because of:
· Side seals
· Bottom gusset folds
· CR zipper placement
· Top sealing area
· Material thickness
· Clearance needed to insert the device
The device should slide in smoothly without stretching the seals, damaging the zipper or distorting the finished package. This is why we recommend a physical fit test before mass production.
3 Why is a physical fit test important
In a recent project, the all-in-one device measured 53 x 84.5 x 27.5 mm. The original pouch size was W73.85 x H120 + G50 mm.
The measurements looked reasonable on paper, but the pouch was too tight when we inserted the real device. After testing, we revised the pouch to W101.6 x H150 + G50 mm.
The revised pouch provided enough insertion clearance and closed correctly without distorting the package. These dimensions were selected for that specific device and should not be treated as a standard size for every all-in-one product.
4 Who provides the pouch dieline
lekas will provide the production dieline after the pouch structure and key dimensions are confirmed.
Before we prepare it, we confirm:
· Device dimensions
· Finished pouch size
· Gusset depth
· CR zipper type and position
· Top seal height
· Hang-hole requirement
· Tear-notch position
· Rounded or square corners
The dieline normally shows the cut line, bleed, safe printing area, seal zones, zipper position, gusset folds, hang hole and tear notches.
Create the artwork on the dieline we provide. Do not move or scale structural lines unless we confirm the change.
5 Are all marked pouch features required
Round corners
Rounded corners give the pouch a more finished appearance and reduce sharp points during handling. They are recommended, but they are not required for every project.
** Hang hole **
A hang hole is optional. Choose it if the pouch will be displayed on retail hooks. It may be unnecessary if the pouch will stand on a shelf, ship in a display box or be sold mainly online. Confirm its size and position before the dieline is prepared.
Tear notches
CR zipper
A child-resistant zipper is needed when the product and target market require child-resistant packaging. Select the zipper style before the dieline is prepared because it affects pouch height, the seal area and opening instructions.
A CR component does not automatically confirm that every finished package meets every market requirement. Regulations vary by jurisdiction, so the customer should review the final package with its compliance team.
Bottom gusset
A bottom gusset adds internal volume and helps the pouch accommodate the device thickness. It is recommended for many all-in-one devices, but the correct depth should be confirmed through packing and fit testing.
6 What artwork files should I prepare
After receiving our dieline, prepare the artwork in an editable Adobe Illustrator file or a print-ready PDF.
Before submission, check that:
· The supplied dieline has not been scaled
· Fonts have been converted to outlines
· Images are embedded and high resolution
· Bleed extends to the required area
· Important text stays inside the safe zone
· Barcodes and QR codes have been tested
· Required warnings and compliance information are included
· The front, back and gusset directions are correct
We review the artwork for production issues. The customer remains responsible for approving final text and regulatory content.
7 Should I make a physical sample before mass production
Yes, especially for a new device or a large order. A physical sample allows us to check:
· Whether the device inserts smoothly
· Whether the pouch closes correctly
· Whether the CR zipper operates properly
· Whether the gusset expands as expected
· Whether the package keeps a clean finished appearance
· Whether the hang hole and tear notches are correctly positioned
· Whether the artwork direction is correct
A simple fit test can prevent thousands of incorrectly sized pouches from being produced.
8 What must be approved before production
Confirm the following before mass production:
· Final device model and dimensions
· Finished pouch dimensions
· Material structure and thickness
· CR zipper requirement
· Gusset depth
· Hang hole
· Tear notches
· Corner shape
· Dieline
· Artwork
· Printing colors and surface finish
· Physical fit sample